Showing posts with label 2. Show all posts

Sunday, October 13, 2013

Unlock iPhone 3GS On iOS 5 0 1 By Patching Ultrasn0w 1 2 4

iOS 5.0.1 is out from past couple of weeks but still an Ultrasn0w update has not been released in order to unlock iPhone 3GS with BB 6.15.00 on it. A lot of users who restored iOS 5.0.1 on their iPhone 3GS but rely on unlock were stuck with a “No Service” error on their Home Screen. Yesterday we posted about Ultrasn0w fixer which is a third party solution to unlock your iPhone 4 and iPhone 3GS on iOS 5.0.1 but that solution is having some problem. Some people were getting dependency issues and even developers of that tweak refused release a fix for it.
Anyhow, folks over BiPR came up with a brilliant manual Ultrasn0w patch which will fix ultrasn0w 1.2.4 and make it work on iPhone 3GS running iOS 5.0.1. Don’t panic it’s an easy process and we tried it personally and we can confirm that it works for iPhone 3GS iOS 5.0.1.
Important: By following this method you can ONLY unlock iPhone 3GS running iOS 5.0.1 with iPad’s baseband 6.15.00 (which most of iPhone 3GS users are running now). DO NOT try it on iPhone 4.
How To Unlock iPhone 3GS On iOS 5.0.1 BB 6.15.00 By Patching Ultrasn0w 1.2.4:
Things you will need during this process:
  • Jailbroken iPhone 3GS running iOS 5.0.1 with baseband 6.15.00 (If you’re not jailbroken on iOS 5.0.1 you can follow our complete step by step guide to jailbreak it using Sn0wbreeze )
  • Ultrasn0w 1.2.4 patch file (Download)
  • iFile (if you don’t have it in your iPhone you can get it by adding xSellize Repo repo )
  • iExplorer (Download for Windows | Mac)
Before you begin: Take out SIM card from your iPhone
Step 1: Download Ultrasn0w 1.2.4 patch file from the link above and extract it on your desktop.
Step 2: Connect your iPhone 3GS to computer via USB cable.
Step 3: Run iExplorer which you downloaded from the link above, it will automatically detect your iPhone 3GS and display your iPhone 3GS’s files in Windows Explorer like view.
Step 4: Navigate to
raw file system/System/Library/Frameworks/CoreTelephony.framework/Support/
Step 5: Before making further changes, back-up CommCentreClassic file by renaming it to CommCentreClassicOld and to be on the safe side save a copy of it locally on your computer as well.
Step 6: Copy and Paste CommCentreClassic file which you downloaded and extracted on desktop in Step 1
Step 7: Now let’s get back on your iPhone 3GS, launch iFile on your iPhone 3GS and navigate to :
System/Library/Frameworks/CoreTelephony.framework/Support/
Step 8: Tap on commcenterclassic, click the Blue arrow next to the file name, go to Access Permissions and set the following permissions:
  • User: Read, Write, Execute
  • Group: Read, Execute
  • Global: Read, Execute
Step 9: Launch Cydia from your iPhone 3GS’s homescreen and install ultrasn0w 1.2.4 from there.
Step 10: Disable 3G option and Cell Data Network under Settings > General >Network. Now you can insert your SIM card
BOOM! You iPhone 3GS with baseband 6.15.00 should be unlocked on iOS 5.0.1 now.
If you face any problems during this process feel free to contact us, we’ve tested this process and we can confirm that it works perfectly fine.

If an Ultrasn0w update comes for iOS 5.0.1 which is expected very soon all you have to do is replace the patched file with your back-up file and re-run ultrasn0w
Read More..

Friday, October 11, 2013

Ultrasn0w 1 2 3 to unlock 4 3 3 iPhone 4 3GS

Ultrasn0w 1.2.3. iPhone dev-team has released new version of ultrasn0w, they released ultrasn0w 1.2.3 to unlock iPhone 4 and iPhone 3GS on iOS 4.3.3 on old basebands. check out all supported basebands on ultrasn0w 1.2.3 after the jump


Supported basebands:
01.59.00 / 04.26.08 / 05.11.07 / 05.12.01 / 05.13.04 / 06.15.00

Unsupported basebands :
02.10.04 / 03.10.01 / 04.10.01 / 05.14.02 / 05.15.04 / 05.16.02


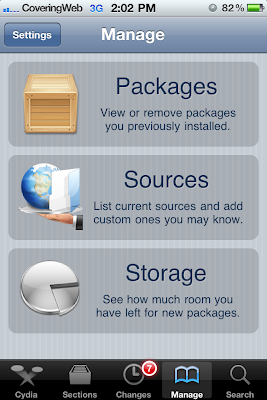
Step 1: Open Cydia on your iPhone 4 or 3GS, Go to Manage->Sources


Click here to enlarge


Step 2: Now tap on “Edit”, then tap on “Add”
Enter the following repo http://repo666.ultrasn0w.com then tap on "Add Source" as shown below.

Click here to enlarge

Step 3: Now search for ultrasn0w 1.2.3 then install it. By installing ultrasn0w 1.2.3, your device became unlocked

Click here to enlarge

Step 4: Finally, restart your iPhone and you should now enjoy an unlocked iPhone 4 or 3GS on iOS 4.3.3.
Read More..

Tuesday, October 8, 2013

CYDER 2 Install Cydia Packages without WiFi 3G Internet Connection

[TUTORIAL]

With Cyder, you can install aplications, (or unlock without wifi) on jailbreacked iphones , without internet or cydia, just put your *.deb aplications on archive Folder, and their appear for install on your iphones.-
the latest version of itunes make probs, using cyder, the files here have solved this problem

You need update itunes to last 10.5 version first!!


Hello everyone !
I remember when I first got my iPodClick here to enlarge touch 2G, I didn’t have a Wi-Fi connection. So obviously I was irritated that I couldn’t download any Cydia apps.
Well, I chanced upon Cyder at the time ! And it was great, but it was a bit rusty, had a few bugs and crashed often.
However, its been a while since Cyder 2 has released and it has none of the problems the original Cyder had. So I think it’s only fair that I should write a tutorial on how to use it.

WHAT IS CYDER 2 ??
Cyder 2 is a revamped version of Cyder, a program that lets you browse, download and install the various packages from Cydia sources to your iPodtouchClick here to enlarge/iPhone. It is extremely useful for people who don’t have Wi-Fi.

REQUIREMENTS:
You will need the following :
-Jailbroken iPod touch/iPhone with Cydia
-USB cable
-Cyder 2 [Download Link 1] [Download Link 2]
-SSH Program like WinSCP,iFunBox [OPTIONAL]

How do I use it ?
1)Plug in your iDevice via USB cable
2)Open up Cyder 2
3)You would see the following Tabs on top of the windows – Sources, Packages, Downloads, File Manager,Settings

SOURCES-Add Cydia Sources here

Click here to enlarge

1)If you don’t see sources already click “Get sources from Cydia”. You can also add sources by right clicking. You can transfer the sources over to Cydia and also import installed packages via the buttons.
2) Here is a list of the default Cydia sources:
Quote:

PACKAGES-View Cydia Packages here (Via sources added)

Click here to enlarge

1)You can scroll through a list of packages, or filter them by Source, Section or Modified. You can also Search for packages here.
2)When you select a package (e.g. Winterboard) you can view its details. You can see its dependencies, source, author etc.
3)Download a package by right clicking and choosing to either download only that package or the package and its dependencies. It is preferrable to always download with dependencies.

DOWNLOADS-Download Cydia Packages

Click here to enlarge

1)You can see all packages that are chosen to be downloaded from the Packages section.
2)There is a thumbnail at the right of each package indicating that the package status. [Grey Box=Not Downloaded , Blue Arrow=Downloading, Yellow/Orange Box=Downloaded]
3)You can choose to download whichever packages you want here by right clicking again and choosing from the options.
4)In case you did not choose to Download with dependencies, you can even add the dependencies of a package on this screen.


FILE MANAGER-Manage Downloaded Packages

Click here to enlarge

1)You will see all the packages you downloaded earlier in this tab.
2)You now have the option to either transfer them into Cydia’s Cache , Cydia’s AutoInstall or the AppCake Folder.
3)I prefer transferring to Cydia’s AutoInstall as transferring Cydia’s cache has proved a bit unreliable for me. You can also transfer them into the AppCake folder to install via AppCake
4)To install the packages, drag them into Cydia AutoInstall.
5)Close Cyder 2.
6)Reboot iDevice !
7)Respring iDevice
8)In case the package does not install still try Rebooting and Respringing once more.

SETTINGS-The Control Panel


1)You won’t need to go much into settings and I barely (NEVER) use it.
2)You can use a proxy for transferring packages, edit confirmation messages and check compatibility. (Nothing Great)
3)As I said before you do NOT need to bother about Settings.


THE “Cyder2” Folder

Click here to enlarge

1)The Cyder2 Folder is what you get after you unzip the Cyder2 zip file.
2)In the event that Cyder is unable to install a package for you, you can always obtain the .deb file of that package from this folder.
3)Just navigate to Cyder2/archives for all the .deb files you have downloaded via Cyder.
4)You could now SSH into you iDevice and transfer it to AutoInstall(/var/root/Media/Cydia/AutoInstall) or install via iFile etc.


Jump for Joy ! Kiss your iDevice !
You can now say "Muahahah Wi-Fi I dont need you !"


Thanks for reading guys !
Read More..

Monday, October 7, 2013

Sn0wbreeze 2 8b1 Released To Jailbreak iOS 5 Beta 1 Tethered On Windows

iH8sn0w has finally updated sn0wbreeze. Sn0wbreeze 2.8b1 is now available for download and will jailbreak iOS 5 beta 1 tethered on iPhone, iPad and iPod touch.
sn0wbreeze v2.8 BETA 1 Release Notes:
————————————–
* Supports iOS 5.0 BETA 1 (9A5220p)
* Supports the following Devices:
- iPhone 3GS
- iPhone 4 [GSM]
- iPhone 4 [CDMA]
- iPod Touch 3G
- iPod Touch 4
- iPad 1G
————————————–
* Props to @MuscleNerd for the kernel patches. :)
————————————–
* THIS IS INTENDED FOR DEVELOPERS ONLY!!!
* This sn0wbreeze does NOT add afc2 or Hacktivate to prevent users from removing the UDID check after jailbreak.
* UNLOCKERS SHOULD STAY AWAY!!!
* This is a /TETHERED/ jailbreak via iBooty.
————————————–
Now available at: http://ih8sn0w.com/sb28b1
————————————–
// iH8sn0w
Please keep in mind that iOS 5 beta 1 jailbreak is tethered as of now and will require you to connect your jailbroken device to the computer every time you boot it up
Read More..

With TinyUmbrella 04 32 00 Save 4 3 2 4 2 7 SHSH for iPhone iPod Touch iPad

TinyUmbrella, has pushed a new update from TinyUmbrella to version 4.32.00 to allow you to save iOS 4.3.2 on iPhone 4, 3GS, iPod touch 4G, 3G and iPad, also TinyUmbrella 4.32.00 allows you to save SHSH for Verizon iPhone 4 running iOS 4.2.7.
Click here to enlarge
As a reminder, to save your SHSH blobs, simply connect your iDevice via USB to your computer, launch TinyUmbrella, and click the “Save SHSH” button.

Download TinyUmbrella 4.32.00 for Mac
Download TinyUmbrella 4.32.00 for Windows
Read More..

Sunday, October 6, 2013

How To Unlock iPhone 4 3GS on iOS 4 3 1 with Ultrasn0w 1 2 1 Guide

iPhone Dev-Team has released ultrasn0w 1.2.1 unlock to support iOS 4.3.1 unlock on old basebands and to fix signal issues which reported by some users after jailbreaking iPhone 4, 3GS on iOS 4.3.1
We’ve pushed out the 4.3.1 compatibility fix for ultrasn0w in Cydia — it’s now at version 1.2.1. If you’re not already at 4.3.1 and you need the unlock, please be sure you understand how to get to 4.3.1 using a custom IPSW that doesn’t update your baseband.

This isn’t a new unlock! It’s to allow those who are already unlocked to use FW 4.3.1. It also fixes the signal bar issue for those who aren’t using the unlock but retain an older baseband intentionally.

AFTER INSTALLING ULTRASN0W 1.2.1, PLEASE REBOOT YOUR iPHONE using the normal “slide to power off” swipe. T-Mobile users in the USA also should disable 3G mode in Settings->General->Network.


ONLY
Supported basebands: (01.59.00 / 04.26.08 / 05.11.07 / 05.12.01 / 05.13.04 / 06.15.00)
iPhone 3GS preparation for unlock: you have to jailbreak and update your iPhone 3GS to 6.15.00 baseband on iOS 4.1 / 4.2.1

Step 1: You have to jailbreak your iPhone 4 / 3GS on iOS 4.3.1 with preserving your old baseband,

Step 2: Once you jailbreak yoour device, you can now unlock your iPhone 4 / 3GS with Ultrasn0w 1.2.1 from Cydia. To do so, follow the steps below:
  • Press to launch Cydia Installer from your SpringBoard.
  • Press to select the Manage tab at the bottom of the screen.
  • Press to select the Sources button.

Click here to enlarge
  • Now touch on Edit and then on Add. You will be prompted to enter the URL of the source. Type http://repo666.ultrasn0w.com and touch on Add Source to add this repository.
Click here to enlarge

Cydia will now automatically update your sources by following a series of automated steps.
  • After installation is completed. Search for “ultrasn0w 1.2.1” in Cydia and install this application. This app will automatically unlock your iPhone so that you can use it with any carrier.
Click here to enlarge

Step 3: Almost done, now simply reboot your iPhone and you should have a fully unlocked iPhone 3GS / 4 on iOS 4.3.1.
Read More..

Friday, October 4, 2013

How To Use Gevey SIM Ultrasnow 1 2 4 on IOS 5 And What’s the Diffrence


If you decided to unlock your iPhone 4, 3GS on iOS 5 so you have two ways the
  • First way: is to use Ultrasnow 1.2.4 which has released by the Dev- team to unlock iPhone 4, 3GS on iOS 5 which supported these baseband 01.59.00 / 04.26.08 / 05.11.07 / 05.12.01 / 05.13.04 / 06.15.00.
  • Second way: is to use Gevey SIM in order to unlock iPhone 4 on iOS 5 Gevey Sim supported baseband 01.59.00 / 02.10.00 / 03.10.1 / 04.10.1 but notes if you have an iPhone 4 that is currently unlocked with a Gevey SIM card, you can unlock your iPhone on the iOS 5 firmware with the same Gevey SIM card as long as you preserve your baseband while updating to the iOS 5 firmware. So the difference between UltraSn0w and the Gevey SIM card, is that UltraSn0w only supports a limited number of older basebands while the Gevey SIM card supports a limited number of newer basebands.
Days ago we showed you how To Unlock iPhone 4, 3GS On iOS 5 using Ultrasn0w 1.2.4 so how to unlock iphone using Gevey Sim on iOS 5 ? here’s the answer below.

Download Required:

  • Download iOS 5 firmware
  • Download iTunes 10.5
  • Download Redsn0w 0.9.9b5
How to preserve iPhone 4 baseband guide


STEP 1: Connect your iPhone 4 into you computer then open Redsn0w 0.9.9b5.
STEP 2: Now select Extras then “Custom IPSW” option so that you can create your pre-jailbroken custom firmware.
STEP 3: Redsn0w will start cooking your custom IPSW and you’ll get it in few minutes.
STEP 4: Once you get your firmware, select ‘Pwned DFU’ from RedSn0w.
STEP 5: Follow the on-screen instructions to get your iPhone in DFU mode.
STEP 6: Once it’s in DFU mode, close Redsn0w then open iTunes 10.5 downloaded above and you should get your iPhone in Recovery Mode message.
STEP 7: Now hold the Option key on Mac and hit Restore. Point iTunes to your iPhone 4 Custom iOS 5 IPSW which begins with NO_BB. (WARNING: Don’t select the stock one or you’ll lose your unlock)
Read More..

Thursday, October 3, 2013

Sn0wbreeze 2 3b1 Brings iOS 4 3 Tethered Jailbreak Stock Update With Baseband Preservation And Fast Tethered Boot Tool

sn0wbreeze 2.3b1 1 Sn0wbreeze 2.3b1 Brings iOS 4.3 Tethered Jailbreak, Stock Update With Baseband Preservation And Fast Tethered Boot Tool
Just a quick heads-up: iH8sn0w pushed a new update to sn0wbreeze which brings the software to v2.3b1. The new updated comes with a lot of *good stuff* such as a tethered jailbreak for iOS 4.3, stock update to iOS 4.3 with baseband preservation, and a real fast tethered boot tool.
You need:
  • iOS device ( iPhone 3Gs/4, iPad 1st gen, iPod Touch 3G/4G )
  • iOS 4.3
  • sn0wbreeze 2.3b1
How to:
1. Even if there are a couple of new features in this release, the functionality of the tool remains the same. Just follow this sn0wbreeze tutorial and you should be good. The only thing you need to pay attention to, when creating a custom iOS 4.3 ipsw, is step 6 of the tutorial. iH8sn0w added a new option which allows you to update your iOS device to a stock iOS 4.3 while preserving your baseband.
sn0wbreeze 2.3b1 6 Sn0wbreeze 2.3b1 Brings iOS 4.3 Tethered Jailbreak, Stock Update With Baseband Preservation And Fast Tethered Boot Tool
Other than that, the process is exactly the same. Just create your custom ipsw, and shift+restore your iOS device.
2. To boot into the tethered kernel, you need to use iBooty which is included with this release of sn0wbreeze. You will notice a new iBooty icon on your desktop. Just open it, select your device, and run it. Can’t get any easier than this.
iBooty Sn0wbreeze 2.3b1 Brings iOS 4.3 Tethered Jailbreak, Stock Update With Baseband Preservation And Fast Tethered Boot Tool

HOW TO: Use Sn0wbreeze To Untethered Jailbreak iOS 4.2.1 [video]

HOW TO: Use Sn0wbreeze To Untethered Jailbreak iOS 4.2.1 [video]

sn0wbreeze 51 HOW TO: Use Sn0wbreeze To Untethered Jailbreak iOS 4.2.1 [video]
A new version of sn0wbreeze was released, which is able to untether jailbreak iOS 4.2.1. This tool allows you to create a custom firmware, and in this tutorial we’re going to show you exactly how to use it.

Snowbreeze is compatible with:
  • iPhone 3G/3GS/4
  • iPod Touch 2G/3G/4
  • iPad
How To:
1. Download Sn0wbreeze
2. Download stock iOS 4.2.1
NOTE: Windows Vista/Win7 users , you will need to run the toll in Administrator mode. To do that, right click on the tool’s icon and select ‘Run as administrator’…
3. Connect your iOS device
4. Open Snowbreeze and you will see a splash screen which tells you that this software is not for commercial use. Click OK ( see splash screen above ). On the next screen just click on the blue arrow to continue…
5. Now you will need to choose the stock iOS 4.2.1 downloaded earlier. Click on ‘Browse’, select it and click ‘Open’…

sn0wbreeze 3 HOW TO: Use Sn0wbreeze To Untethered Jailbreak iOS 4.2.1 [video]

6. Choose ‘Expert Mode’ and click on the blue arrow to continue…

sn0wbreeze 2 HOW TO: Use Sn0wbreeze To Untethered Jailbreak iOS 4.2.1 [video]

7. Now we need to customize our firmware. Just click on ‘General’ and then, click on the blue arrow to continue…
8. Here you can add:
  • animated bootlogos
  • choose to install openSSH
  • resize the root partition
  • add native backgrounding, user wallpaper, battery percentage etc
sn0wbreeze 1 HOW TO: Use Sn0wbreeze To Untethered Jailbreak iOS 4.2.1 [video]
9. Once you are done, click on the blue arrow to continue. Now sn0wbreeze will create the custom firmware
10. Now, you will need to put the device in DFU mode. Follow the instructions on the screen.
15. Open iTunes. It will prompt you with a message that it found a device in recovery mode. Click OK…
16. Hold down the Shift key and click on restore. Choose the custom firmware you just created and click open. MAKE SURE it’s the custom firmware and not the stock one… ( you will recognize the custom one because it’s called ‘sn0wbreeze_iPhone_xxx’ )
17. Wait for iTunes to restore your iOS device with the custom firmware.
18. That’s it. Enjoy
NOTE: sn0wbreeze may fail. If it does, visit ih8sn0w’s website and check if there is an updated version available

Read More..

Wednesday, October 2, 2013

Sn0wbreeze Updated To v2 6 With iOS 4 3 2 Untethered Support

snowbreeze Sn0wbreeze Updated To v2.6 With iOS 4.3.2 Untethered Support
Just a quick heads-up: sn0wbreeze was updated with support for untethered iOS 4.3.2 jailbreak. This update allows us to create a custom .ipsw on Windows machines and untethered jailbreak iOS 4.3.2.

Supported device:
  • iPhone 3G[S]/4
  • iPod Touch 3G/4
  • iPad 1G
  • Apple TV 2
You can download sn0wbreeze v2.6 here . If you you don’t know how to use sn0wbreeze,
Read More..

Tuesday, October 1, 2013

How to Use Sn0wbreeze To Untethered Jailbreak iOS 4 3 3 And 4 2 8 Windows

Click here to enlarge


A new version of sn0wbreeze was released, which is able to untethered jailbreak iOS 4.2.3 and iOS 4.2.8 for Verizon iPhone 4. This tool allows you to create a custom firmware, and in this tutorial we’re going to show you exactly how to use it.

Compatibility:
  • iPhone 3G[S]/4/Verizon 4
  • iPod Touch 3G/4
  • iPad 1
  • Apple TV 2
How To:
NOTE: the below tutorial uses screenshots from our previous sn0wbreeze tutorial. Don’t worry about it, the necessary adjustments have been made and the process is exactly the same.


1. Download
Hotfile.com: One click file hosting: sn0wbreeze-v2.7r2.zip
NOTE: Windows Vista/Win7 users , you will need to run the toll in Administrator mode. To do that, right click on the tool’s icon and select ‘Run as administrator’…

3. Connect your iOS device

4. Open Snowbreeze and you will see a splash screen which tells you that this software is not for commercial use. Click OK ( see splash screen above ). On the next screen just click on the blue arrow to continue…

5. Now you will need to choose the stock iOS 4.3.3 downloaded earlier. Click on ‘Browse’, select it and click ‘Open’…


Click here to enlarge

6. Choose ‘Expert Mode’ and click on the blue arrow to continue…

Click here to enlarge

7. Now we need to customize our firmware. Just click on ‘General’ and then, click on the blue arrow to continue…
8. Here you can add:
  • animated bootlogos
  • choose to install openSSH
  • resize the root partition
  • add native backgrounding, user wallpaper, battery percentage etc

Click here to enlarge

9. Once you are done, click on the blue arrow to continue. Now sn0wbreeze will create the custom firmware

10. Now, you will need to put the device in DFU mode. Follow the instructions on the screen.

Click here to enlarge

11. Open iTunes. It will prompt you with a message that it found a device in recovery mode. Click OK…

Click here to enlarge

12. Hold down the Shift key and click on restore. Choose the custom firmware you just created and click open. MAKE SURE it’s the custom firmware and not the stock one… ( you will recognize the custom one because it’s called ‘sn0wbreeze_iPhone_xxx’ )

13. Wait for iTunes to restore your iOS device with the custom firmware.

14. That’s it. Enjoy
Read More..

Wednesday, September 25, 2013

How to jailbreak iOS 6 1 2 with evasi0n 1 4

Jailbreak iOS 6.1.2

Evasion 1.4 was just released with support for the recently released iOS 6.1.2, and we’ve got the details on how to use it to jailbreak your iDevice of choice. Although iOS 6.1.2 doesn’t bring any new features to the table, there is a bug fix that makes the upgrade worth it.
Take a look inside as we show you how to jailbreak iOS 6.1.2 with evasi0n 1.4. This tutorial is for the Mac, but the same principal applies across all computing platforms.

Video Tutorial

How to jailbreak iOS 6.1.2

Notes: As always, before we get started, there are a few things to keep in mind here. First, read our jailbreak preparation post. It covers a few vital ideas that should make your life easier when it comes to managing and maintaining your jailbreak.
Be sure that your device’s passcode lock is disabled. The passcode lock can interfere with the jailbreak process. Also, make sure that when you upgraded to iOS 6.1.2, it was done, not via an OTA update, but via an iTunes update. While it’s possible that it will work, OTA updates have caused known problems in the past with regard to jailbreaks, it’s best to just play it safe. Okay, let’s get started!

Step 1: Head over to our download page, and download evasi0n 1.4. The downloads are available for Mac, Windows, or Linux.
Step 2: Save the evasi0n app to your desktop, and run it.
Step 3: Connect your iOS device to evasi0n, and ensure that evasi0n detects your device. Evasi0n should work with any iOS 6 firmware from iOS 6.0 to iOS 6.1.2. In this case, you will be using iOS 6.1.2.
Step 4: Click the jailbreak button, and the jailbreak process will begin. Be patient, as this takes a while. You will notice your device reboot several times throughout the entire process. The main thing is just to be patient.
Step 5: Eventually, evasi0n will ask you to unlock your device, and tap the Jailbreak icon on your Home screen once. Follow these instructions, ensuring that you tap the icon only one time, and then leave the device alone and let it continue.
Step 6: The evasi0n app will complete its course, and you will be able to click the Exit button. The iOS device, however, still needs to finish up a few additional steps, so again, be patient and don’t touch your device.
Step 7: Eventually, the jailbreak will finish, and you can unlock your iOS device, and open the Cydia app on your Home screen. Cydia will need to initialize, which takes about 1 to 2 minutes. After the initialization is complete, the device will respring again.
Step 8: Reopen Cydia, select Hacker, and begin enjoying your newly jailbroken iOS device running iOS 6.1.2.

Remember, this is an untethered jailbreak, so you can feel free to reboot your device at will. Also, remember to take the necesarry steps to protect your jailbreak. you can do so by reading our post that describes how to protect device.

Be sure to let me know what you think in the comment section below if you have any questions, comments, or concerns regarding this latest update to evasi0n.
Read More..

Tuesday, September 24, 2013

iPhone 4 Unlock With GEVEY SIM Blocked By Apple In iOS 5 Beta 2

Apple has blocked iPhone 4 unlock with GEVEY interposer SIM, earlier today Apple seeded iOS 5 beta 2 to developers with some minor changes which also included this. Musclenerd from iPhone-Dev team has confirmed that the hole has been patched and Gevey SIM won’t work with iOS 5 beta 2.

In a tweet today he said :
it’s surprising Apple closed Gevey interposer hole in b2 rather than waiting until final (maybe they were under pressure)

If you rely on unlock we strongly recommend you not to upgrade to iOS 5 beta 2. Gevey’s SIM Interposer was able to unlock the iPhone 4 by force activating the baseband using the emergency dialer. This hole was not patched in iOS 5 beta 1 release and Gevey SIM worked perfectly.

Apple could’ve waited for the final release but they didn’t and i believe GEVEY won’t try to release another version of Gevey interposer SIM. They most probably will wait for the final release of iOS 5 which is scheduled this fall.
Gevery SIM supported following basebands:
  • 02.10.xx
  • 03.10.xx
  • 04.10.xx
  • 05.14.xx
  • 05.15.xx
  • 05.16.xx

If your baseband is mentioned in the list above we strongly recommend you to stay away from iOS 5 Beta 2 as it’ll lock you iPhone4 and you won’t be able to use it for cellular services.
Read More..