Showing posts with label using. Show all posts
Showing posts with label using. Show all posts
Saturday, October 5, 2013
Procedure How to Install Cracked Games Apps to your iPhone using iFunBox
iFunBox V1.6.658.564
[DOWNLOAD]
Whats New: Release Notes
File Permission Editing
File Ownership/Group Editing
SSH Terminal Console
Enhanced App Install with AppFastIn(TM) Tech
NOTE:Before Installing Crack Apps Install first APPSYNC depend on your iDevice version..
Your iDevice must jailbroken.
[DOWNLOAD]
Whats New: Release Notes
File Permission Editing
File Ownership/Group Editing
SSH Terminal Console
Enhanced App Install with AppFastIn(TM) Tech
NOTE:Before Installing Crack Apps Install first APPSYNC depend on your iDevice version..
Your iDevice must jailbroken.
Crack Apps Download
DOWNLOAD HERE
PROCEDURE
Open iFunbox
click idevice name
click Install Apps Tab

Browse your APPS
and double click or you can select all...
and double click or you can select all...


Monday, September 30, 2013
Fix 1604 1603 1602 1601 1600 Error While Restoring Custom iOS 5 0 1 IPSW Using Updated iREB
If you hit a 1604, 1603, 1602, 1601, 1600 error while trying to restore your iPhone with a custom iOS 5.0.1 firmware file created using Redsn0w then there is now a way to bypass the error.iH8sn0w, developer of Sn0wbreeze has released a new version of iREB tool after almost 10 months, which is compatible with iOS 5.0.1.
iREB is a tool that will put your iOS device into a pwned state so that you can upload custom firmware to it.In addition to the iOS 5.0.1 support, iREB r5 includes a number of fixes and improvements:
- Much smaller file size (390kb).
- Fixed USB 3.0 issues.
- iREBs speed for the iPhone 2G/iPhone 3G/iPod Touch 1G has
- increased significantly!
- Fixed rare DFU detection issues.
- Updated limera1n/steaks4uce payload to not hook "cmd_go"
- on 4.x images (nothing severe, but useless here).

iREB is currently available for only Windows. You can download iREB r5 using this link.
We havent tried it out yet, but if youre looking for a step-by-step guide, you can checkout below to get an idea on how to use it.
====How To Fix 1604, 1603, 1602, 1601, 1600 Error While Restoring Custom iOS 4.2.1 IPSW Firmware File Using iREBIf you hit a 1604, 1603, 1602, 1601, 1600 error while trying to restore your iPhone with a custom iOS 4.2.1 firmware file created using Sn0wbreeze 2.2 for Windows or PwnageTool 4.2 for Mac then there is a way to bypass the error.iH8sn0w, developer of Sn0wbreeze has released a new version of iREB tool, which is compatible with iOS 4.2.1.
iREB is a tool that will put your device into a pwned state so that you can upload custom firmware to it.iREB RC3 supports the following iOS devices:iREB is currently available only for Windows users.Before we start please note that that jailbreaking your iOS device may void its warranty and hence proceed with caution and at your own risk.You can follow these simple step-by-step guide to bypass the 1604, 1603, 1602, 1601, 1600 errors:
- iPhone 2G, iPhone 3G, iPhone 3G[S] (old & new bootrom), iPhone 4
- iPod Touch 2G (MB & MC), iPod Touch 3G, iPod Touch 4G
- iPad
- Apple TV 2
You should now be able to successfully restore your iOS device with the pre-jailbroken iOS 4.2.1 firmware file without hitting the 1604, 1603, 1602, 1601, 1600 error.
- Download the latest version of iREB from iH8sn0w
- Start iTunes (iREB needs iTunes 10 or above, it’s a good idea to use the latest version of iTunes – iTunes 10.1.2 as of now)
- Put your iOS device in DFU mode by following these steps:
- iPhone/iPad/iPod Touch
- Connect your iPhone/iPad/iPod Touch to your computer
- Turn it off
- Hold power and home together for 10 seconds (exactly).
- Release power but keep holding home until the computers beeps as a USB device is recognized
- A few seconds later iTunes should detect your iOS device
- Apple TV 2
- Connect your Apple TV 2 with your Computer via microUSB
- Now reboot your Apple TV by holding down Menu + Down buttons together for around 6 seconds
- After reboot, immediately hold Menu + Play until you see the message in iTunes saying that Apple TV in recovery mode is detected
- Now close iTunes and launch the iREB tool that you had downloaded earlier
- Click on the relevant device from the iREB screen and wait for few seconds until you get a white or red screen on your iOS device
- Now start iTunes again and select your iOS device from the left hand side side bar
- While on the iTunes window, hold the Shift key and click on the Restore button. (This is a VERY IMPORTANT STEP as just clicking the ‘Restore’ button without the ‘Shift’ button will result in restoring your iPhone with the latest firmware, by holding down the ‘Shift’ button, allows you choose the custom iOS 4.2.1 firmware file created using PwnageTool or Sn0wbreeze)
- Navigate and select the custom iOS 4.2.1 IPSW file to restore your iOS device with it


How to Jailbreak Apple TV 2G Untethered on iOS 4 3 1 using Seas0nPass
Pre-launch checklist
Step 1: Unzip the Seas0nPass.zip file and launch Seas0nPass.
 Step 2: If your AppleTV is not yet jailbroken, select Create IPSW. (if already jailbroken, and you just need to do a tethered boot scroll down).
 Step 3: The latest AppleTV software will be downloaded and used to create a custom jailbroken software file.
 Step 4: When prompted, connect your AppleTV using a micro-USB cable (leave power disconnected), and hold both the MENU and PLAY/PAUSE buttons for 7 seven seconds.
 Step 5: iTunes will open automatically and start the restore process.
 Step 6: iTunes will confirm the restore when complete - your AppleTV is now jailbroken. Please proceed to the tethered boot section below.
Note: The AppleTV MUST be disconnected from the computer (for at least a brief moment) after restoring in iTunes for the tethered boot process below to work properly.
Step 1: Open Seas0nPass and select the Boot Tethered option.
Step 2: When prompted, connect the AppleTV to your computer via USB. Wait for the rapid flashing light then connect the power. Once both are connected hold both the MENU and PLAY/PAUSE buttons for 7 seven seconds.
 Step 3: Seas0n Pass will complete the tethered boot automatically. Once complete, remove the USB cable and connect the HDMI cable.
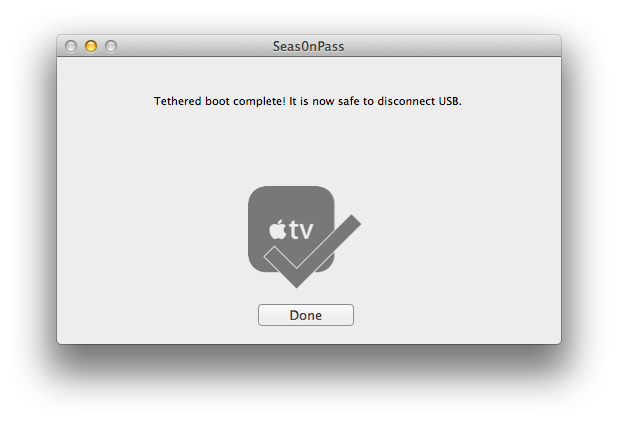
Note: Timing is key. Once the you receive the success message shown below, the USB cable should be removed and HDMI cable connected before the light on the front of the AppleTV stops flashing. (Dont worry there is ample to do this, so you dont need Superman speed).

Read More..
- Make sure youre running the latest version of iTunes.
- Download Seas0nPass: Mac [10.6 or later] | Windows [XP or later]
- A micro USB cable will be required to complete the jailbreak.
- Disconnect all iPods, iPhones, and iPads from the computer before running Seas0nPass.
Step 1: Unzip the Seas0nPass.zip file and launch Seas0nPass.
Using Seas0nPass for a tethered boot
Some AppleTV software versions require a tethered boot. This means the AppleTV must be connected to a computer for a brief moment during startup.Note: The AppleTV MUST be disconnected from the computer (for at least a brief moment) after restoring in iTunes for the tethered boot process below to work properly.
Step 1: Open Seas0nPass and select the Boot Tethered option.
Note: Timing is key. Once the you receive the success message shown below, the USB cable should be removed and HDMI cable connected before the light on the front of the AppleTV stops flashing. (Dont worry there is ample to do this, so you dont need Superman speed).
Saturday, September 28, 2013
Guide iPhone Backup with iTunes using WiFi USB Cable
GSM-Fuckrum has a paste and copy solution here is the real thing..
iOS: How to back up
Summary
This article describes how to back up your iPhone, iPad, or iPod touch using iCloud or iTunes.
Products Affected
iPad, iPhone, iPod touch
iCloud and iTunes can back up most data on your iPhone, iPad, or iPod touch.
Backed-up information includes purchased music, TV shows, apps, and books*; photos and video in the Camera Roll; device settings (for example, Phone Favorites, Wallpaper, and Mail, Contacts, Calendar accounts); app data; Home screen and app organization; Messages (iMessage, SMS, and MMS), ringtones, and more. Media files synced from your computer aren’t backed up, but can be restored by syncing with iTunes.
* Backup of purchased music is not available in all countries. Backup of purchased TV shows occurs only in the United States. Previous purchases may not be restored if they are no longer in the iTunes Store, App Store, or iBookstore.
Collapse All Sections | Expand All Sections
iCloud
How to back up
iCloud automatically backs up the most important data on your iOS 5 device. After you have enabled Backup on your iPhone, iPad, or iPod touch in Settings > iCloud > Backup & Storage, it will run on a daily basis as long as your device is:
- Connected to the Internet over Wi-Fi
- Connected to a power source
- Screen locked
You can also back up manually whenever your device is connected to the Internet over Wi-Fi by choosing Back Up Now from Settings > iCloud > Storage & Backup.
To learn more about what is backed up, see the iCloud: Backup and Restore Overview article.
How to restore from a backup
When you go through Setup Assistant on a new iOS 5 device, choose "Restore from iCloud Backup" and enter your iCloud account and password. You will see the three most recent backups for each of the devices on which you enabled Backup. Choose from which backup to restore.
After your device restarts, your settings and accounts are restored and Backup starts downloading your purchased music, TV shows, apps, books, Camera Roll, and other content*. You may be prompted to enter the passwords for all accounts enabled on your device.
A progress bar will appear underneath the apps that are being downloaded. To prioritize the restore of a specific app, tap its icon. Restore will attempt to download the same version of the app that you had installed previously. If that version is no longer available, the latest version of the app will be restored.
To check if the restore is complete, go to Settings > iCloud > Storage & Backup. Complete the setup assistant after erasing your device (by going to Settings > General > Reset > Erase All Content and Settings) or after starting your new device. When prompted to set up as new or to restore from previous backup, choose to restore from iCloud backup. Then enter your AppleID and password.
iTunes
How to back up
iTunes can create backups of your iOS device when you:
- Sync with iTunes (disabled if you have iCloud backup turned on)
- Right-click (or Control-click) the iOS device in iTunes under Devices and choose Back Up
Use these steps to manually back up your iOS device using iTunes:
- Connect your iOS device to a computer with the latest version of iTunes installed
- Select your iOS device in iTunes under Devices
- Right-click (or Control-click) the device and select Back Up
iOS device backups preserve your settings, the Camera Roll (or Saved Pictures), and other important data. Learn more about what is stored in a backup.
How to restore from a backup
To restore information from a backup, use one of the following methods after connecting your iOS device to the computer with which you normally sync:
- Right-click (or Control-click) the device and choose Restore from Backup
- If you have a new phone, you can connect to iTunes and it will prompt to restore from your backup
Additional Information


Thursday, September 26, 2013
How to Run Windows Apps on Mac OS X using WinOnX
Apple Mac PC’s are much faster, elegant than the windows PC but there is one great thing about windows PC’s which can’t be denied, it is that, Windows OS has a very large collection of apps as compared to the Mac OS. if you are a Mac user then you shouldn’t need to be worry now, as now you can run any Windows app on your Mac OS using WinOnX.
All you need to have a Mac OS 10.6 or higher to install this program. WinOnX is an amazing must have emulator for Mac OS and it can be downloaded from MacApp store for just $4.99.

Step 1: The first is to download and install WinOnX from the Mac App store.

Step 2: Download and install any Windows app that you want to run on your Mac OS.

Step 3: The last step is to locate the program on your Mac. Double click on it and start enjoying Windows app on your Mac OS.

Well, in this way you can use any windows app on your Mac OS for just $4.99.
All you need to have a Mac OS 10.6 or higher to install this program. WinOnX is an amazing must have emulator for Mac OS and it can be downloaded from MacApp store for just $4.99.

How to Run Windows Programs on Mac OS X using WinOnX :
Step 1: The first is to download and install WinOnX from the Mac App store.

Step 2: Download and install any Windows app that you want to run on your Mac OS.

Step 3: The last step is to locate the program on your Mac. Double click on it and start enjoying Windows app on your Mac OS.

Well, in this way you can use any windows app on your Mac OS for just $4.99.
Saturday, September 21, 2013
Jailbreak iOS 5 0 1 For iPhone iPad And iPod Touch Using Redsn0w Or Semi Tether
How TO Jailbreak iOS 5.0.1 Using Redsn0w
Well well well, after the release of iOS 5.0.1 by Apple, earlier today, folks over RedmondPie tested the last version of Redsn0w on iOS 5.0.1 and confirmed that Redsn0w can tethered-jailbreak the final iOS 5.0.1 on iPhone, iPod touch and iPad.

Actually its an old tool so you will jailbreak your iDevice and will connect it to your computer to boot using Redsn0w whenever your iDevice is switched off or rebooted, yes you can use SemiTether to jailbreak your iDevice with this iOS 5.0.1, your iDevice will boot but will not function to a satisfactory degree until connecting your device to Redsn0w.
Well well well, after the release of iOS 5.0.1 by Apple, earlier today, folks over RedmondPie tested the last version of Redsn0w on iOS 5.0.1 and confirmed that Redsn0w can tethered-jailbreak the final iOS 5.0.1 on iPhone, iPod touch and iPad.
Actually its an old tool so you will jailbreak your iDevice and will connect it to your computer to boot using Redsn0w whenever your iDevice is switched off or rebooted, yes you can use SemiTether to jailbreak your iDevice with this iOS 5.0.1, your iDevice will boot but will not function to a satisfactory degree until connecting your device to Redsn0w.
Important Notes:
- iPhone 4S and iPad 2 not supported
- If you want Untethered jailbreak please stay away!
For Unlockers Only:
- For those of you who unlocked iPhone 4 using GEVEY SIM interposer, you should create a custom, IPSW which will preserve your baseband.
- To active this, you should open Redsn0w, hit “Extras”, then “Custom IPSW” then point REdsnow to your iOS 5.0.1.
- Finally, open pwned DFU mode and select:
Quote:
| (Extras > Pwned DFU) and restore to your custom firmware via iTunes. Once complete, you’ll be able to unlock your device with GEVEY once more. |
Getting Started
1- Download iTunes for Mac or Windows .
2- Back your device up through iTunes.
3- Update your iDevice to iOS 5.0.1
4- Download Redsn0w for Mac or Windows.
5- Run Redsn0w, hit “Extras” => “Select IPSW”, point it to iOS 5.0 firmware which you can download from here. Select the appropriate firmware file tailored for your device.
6- Select “Jailbreak” and Select “Install Cydia”, followed by DFU mode and then Redsn0w will do the rest.
7- Now you will need to launch Redsn0w to boot tethered, select “Extras”, follow this step by “Just Boot”. Once everything is complete you will need to follow this simple tutorial again whenever your iDevice is switched off or rebooted.
“Semi-Tethered”
You can follow our simple tutorial posted here to download and install Semi-Tethered on your iPhone, iPad and iPod touch, yes it will allow you to boot your iDevice, but of course not as like Redsn0w, boot with limited use of features.
iOS 5 For iPhone, iPad And iPod Touch Download Links:
-
Download iOS 5 iPhone 4 (GSM)
-
Download iOS 5 iPhone 4 (Verizon)
-
Download iOS 5 iPhone 3GS
-
Download iOS 5 iPad 2 WiFi
-
Download iOS 5 iPad 2 GSM
-
Download iOS 5 iPad 2 CDMA
-
Download iOS 5 iPad
-
Download iOS 5 iPod touch 3G
Download iOS 5 iPod touch 4G
Download iTunes 10.5 for Windows and Mac
6- Select “Jailbreak” and Select “Install Cydia”, followed by DFU mode and then Redsn0w will do the rest.
7- Now you will need to launch Redsn0w to boot tethered, select “Extras”, follow this step by “Just Boot”. Once everything is complete you will need to follow this simple tutorial again whenever your iDevice is switched off or rebooted.
“Semi-Tethered”
You can follow our simple tutorial posted here to download and install Semi-Tethered on your iPhone, iPad and iPod touch, yes it will allow you to boot your iDevice, but of course not as like Redsn0w, boot with limited use of features.
Tuesday, September 17, 2013
Jailbreak Your Apple TV 2G Using Seas0nPass Mac 4 4 3
These are instructions on how to jailbreak your Apple TV 2G on iOS 4.4.3 using Seas0nPass. Please note this a tethered jailbreak and will require the help of a computer to reboot your device if its powered off.
Step One
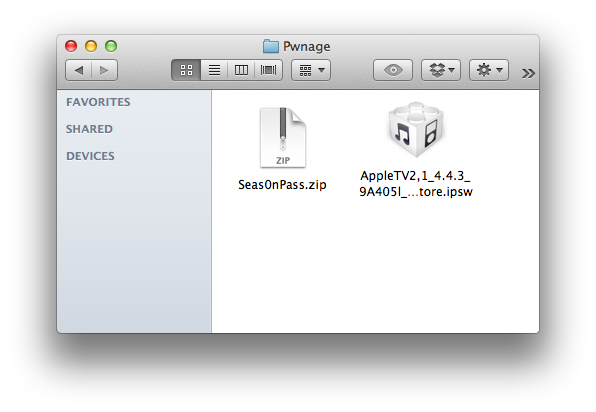
Create a Pwnage folder on your desktop. Download and place the latest version of Seas0nPass and the Apple TV 4.4.3 firmware ipsw into the folder.
- Seas0nPass
- Apple TV Firmware
Step Two
Double click the Seas0nPass archive to extract it. Then double click the extracted Seas0nPass application to launch it.

Step Three
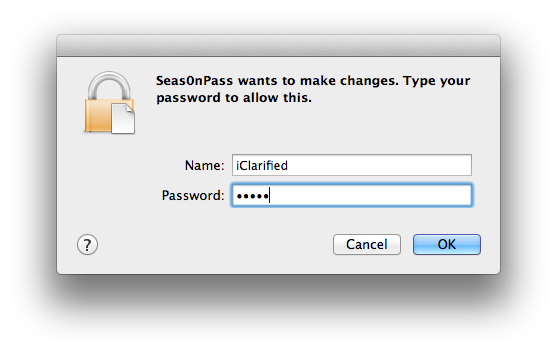
When prompted, input your administrative username and password then click the OK button.
Step Four
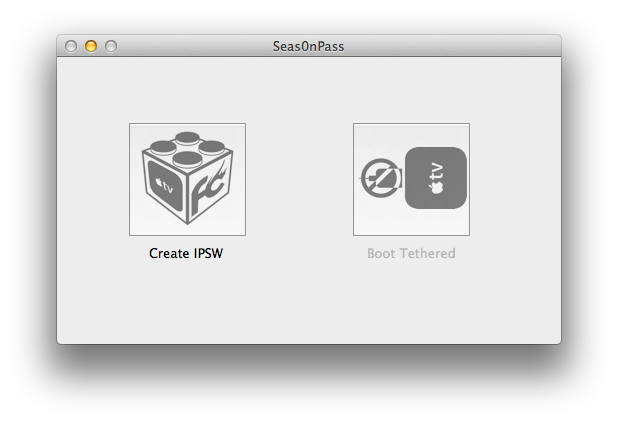
Hold down the Option key and click the Create IPSW button.
Step Five
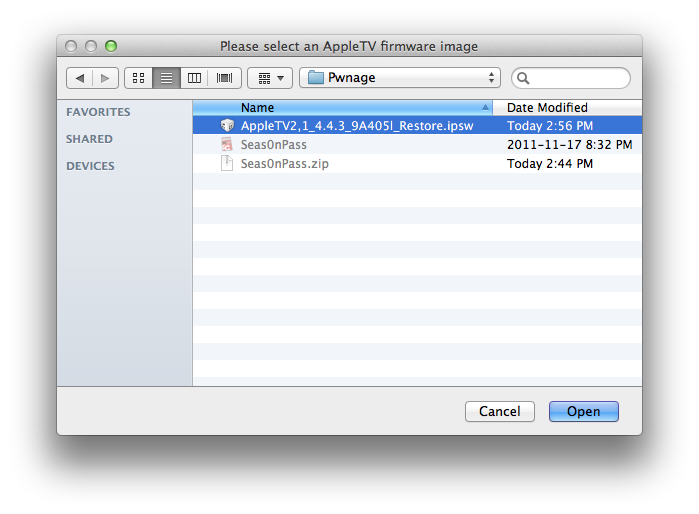
Select the Apple TV ipsw from the Pwnage folder on your desktop and click the Open button.
Step Six
Seas0nPass will now prepare your custom IPSW.
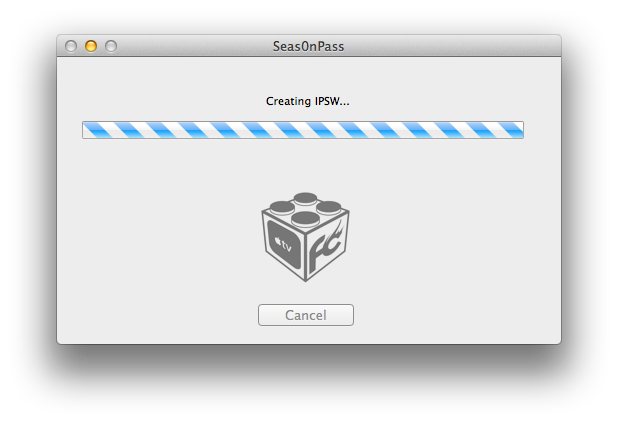
Step Seven
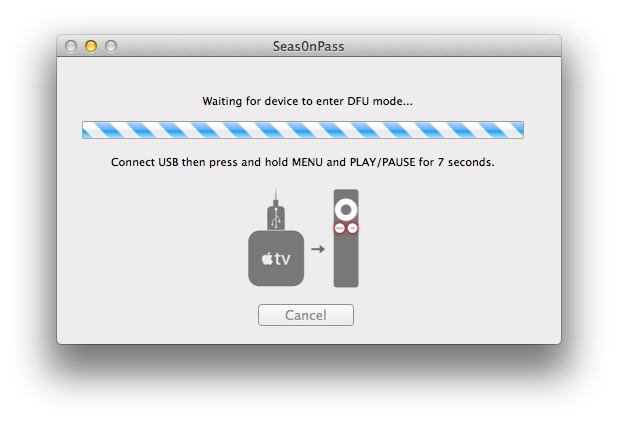
Once your custom IPSW file has been created, Seas0nPass will ask you to connect the Apple TV to your computer via a micro-USB cable and use the remote to put it into DFU mode by holding MENU and PLAY/PAUSE for 7 seconds. The power cable should be unplugged during this process. Immediately hold the buttons after inserting the USB cable.
Step Eight
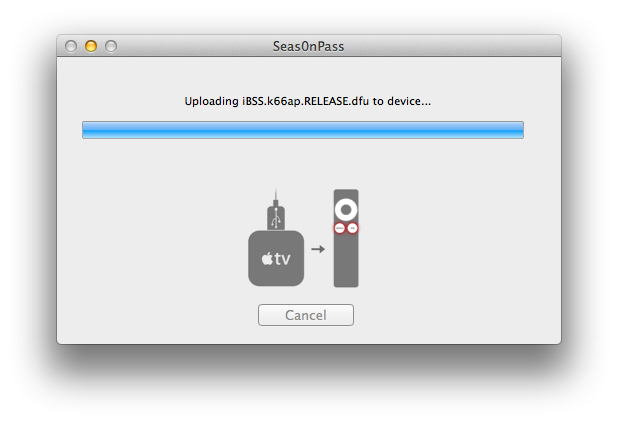
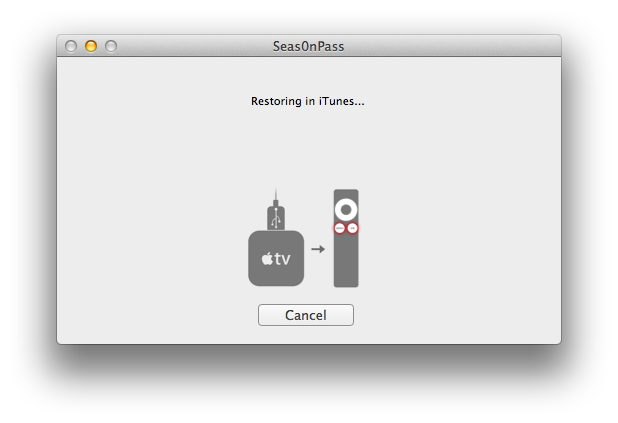
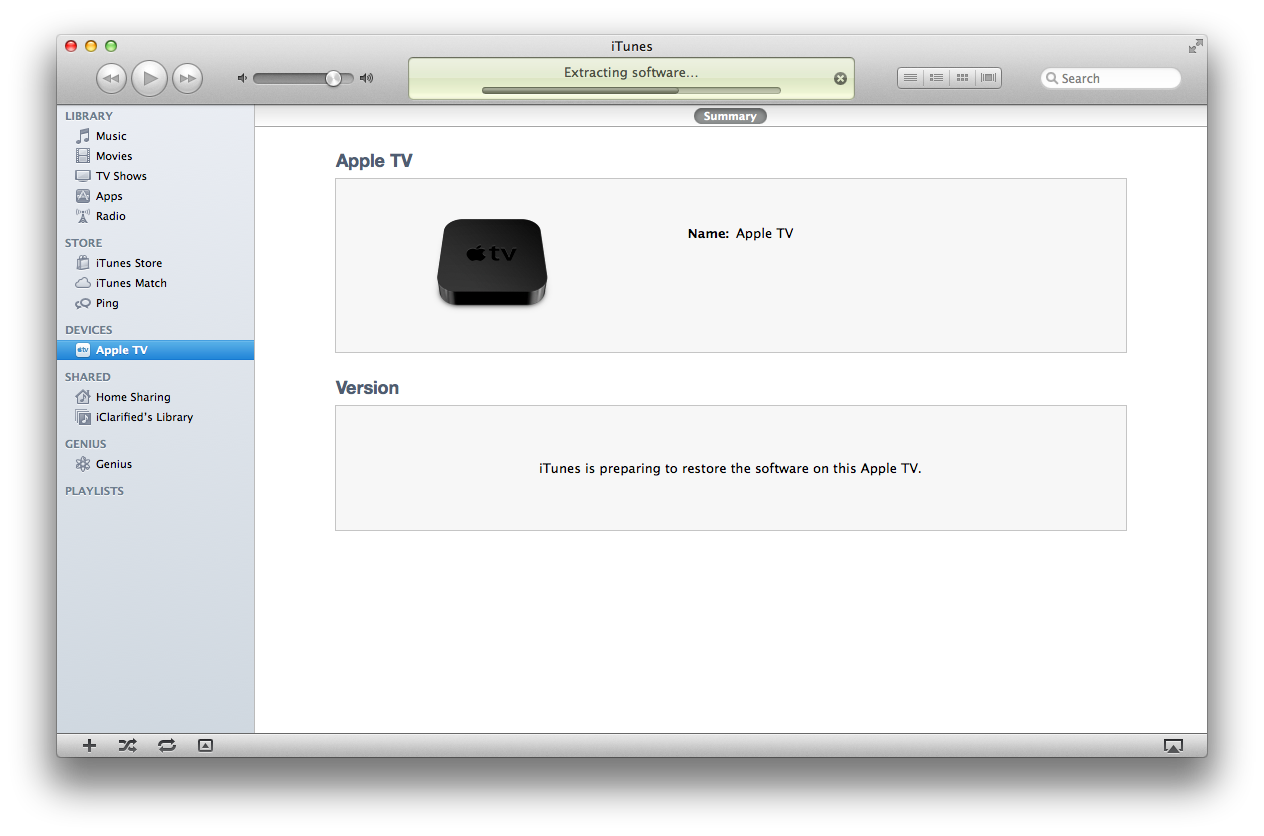
Once your Apple TV has been detected in DFU mode, Seas0nPass will upload some files, automatically launch iTunes, and beginning restoring to the new firmware.
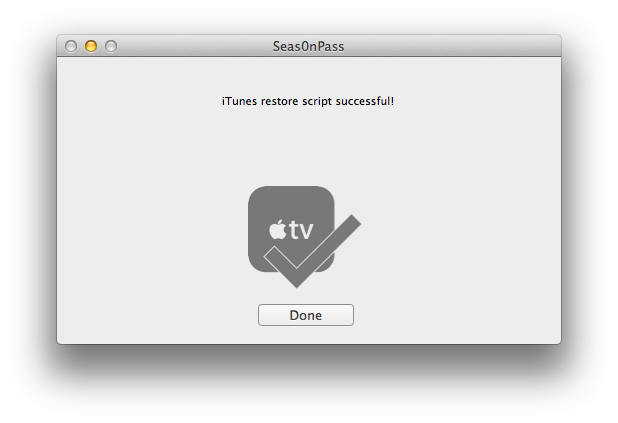
BOOT TETHERED
To boot your Apple TV you will need to follow these instructions.
Step One
Launch Seas0nPass by double clicking its icon.
Step Two
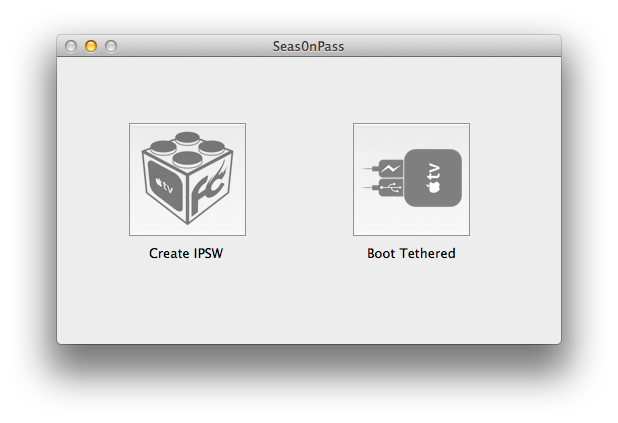
Select Boot Tethered from the main menu.
Step Three
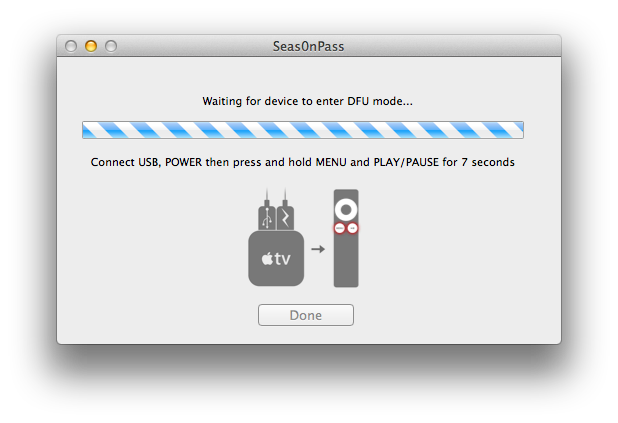
Connect the Apple TV to the computer via USB, plug it into the power outlet, and hold MENU and PLAY/PAUSE on the Apple TV remote for 7 seconds.
Step Four
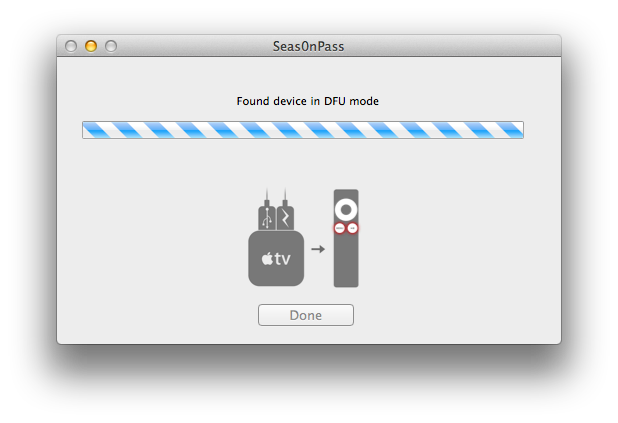
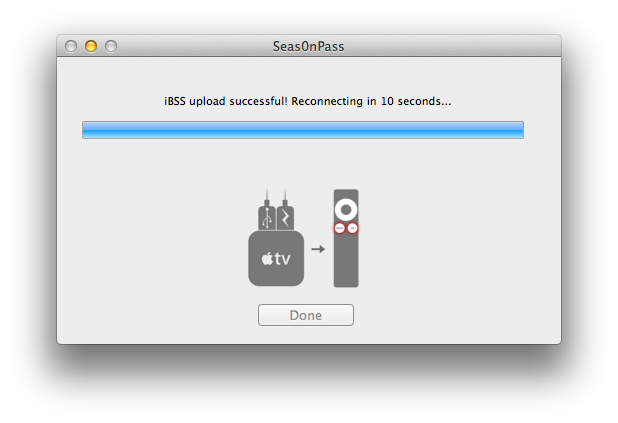
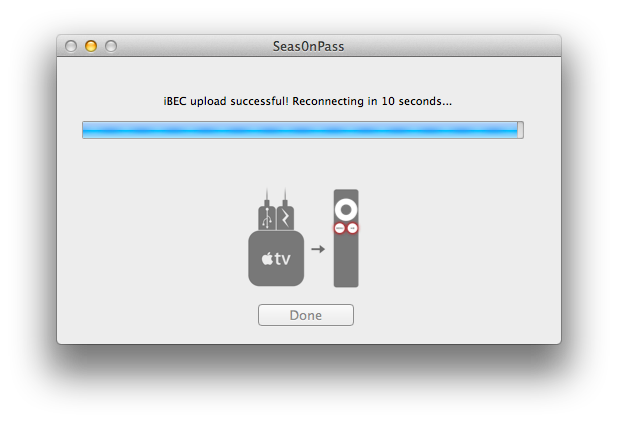
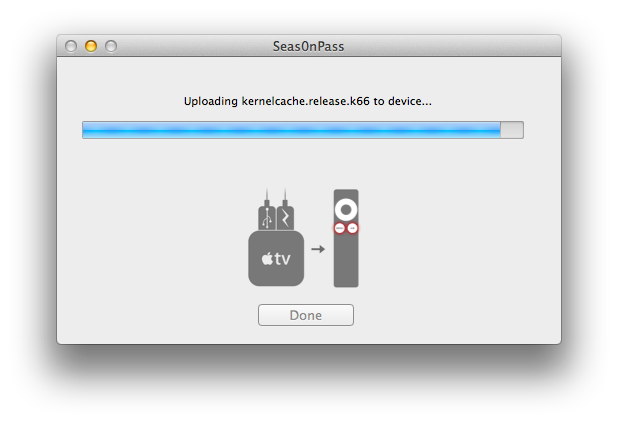
Seas0nPass will detect the device in DFU mode and begin the boot process.
Step Five
Once the tethered boot is complete you can remove the USB cable and connect the HDMI cable to begin using your jailbroken device!
How to Jailbreak Your iPad 1 Using RedSn0w Windows 4 3 5
These are instructions on how to jailbreak your iPad 1 on the 4.3.5 firmware using RedSn0w for Windows. The Mac version of this tutorial is here. If you are on 4.3.3 or lower make sure you do NOT update to iOS 4.3.5. Use the untethered JailbreakMe instead. You can find the appropriate JailbreakMe tutorial here.
Step One
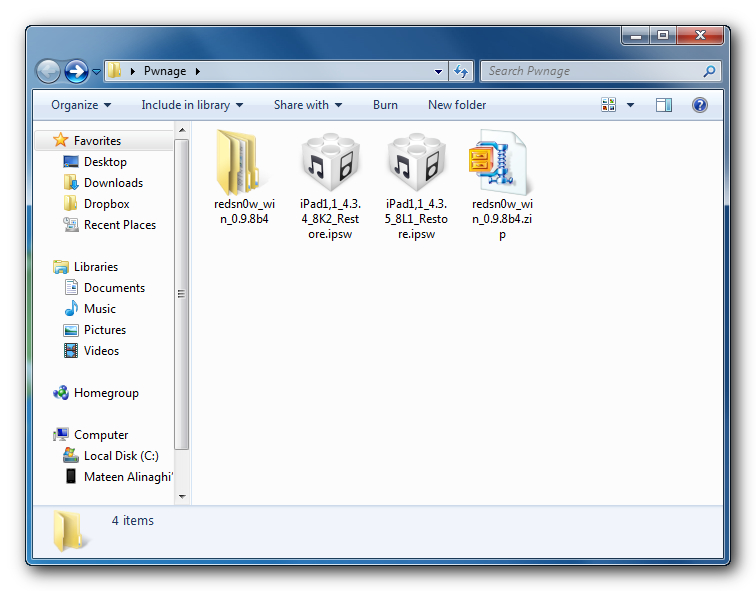
Create a folder on your desktop called Pwnage
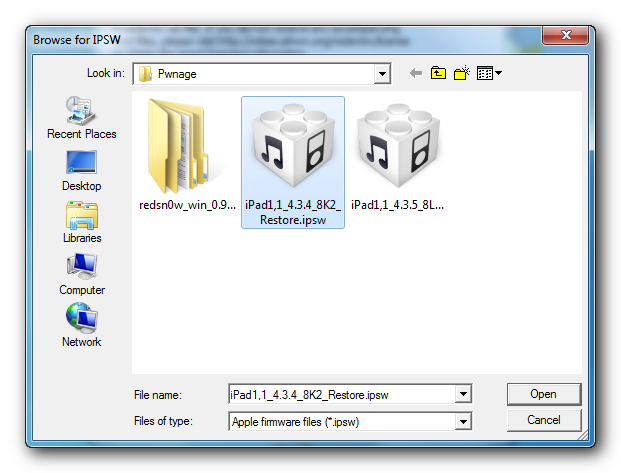
Download RedSn0w from here and place it in the Pwnage folder. Likewise, download the latest 4.3.4 and 4.3.5 firmware from below and place it in the same folder.
4.3.4 (iPad 1): iPad1,1_4.3.4_8K2_Restore.ipsw
4.3.5 (iPad 1): iPad1,1_4.3.5_8L1_Restore.ipsw
Extract the RedSn0w zip file into the same folder.
Step Two
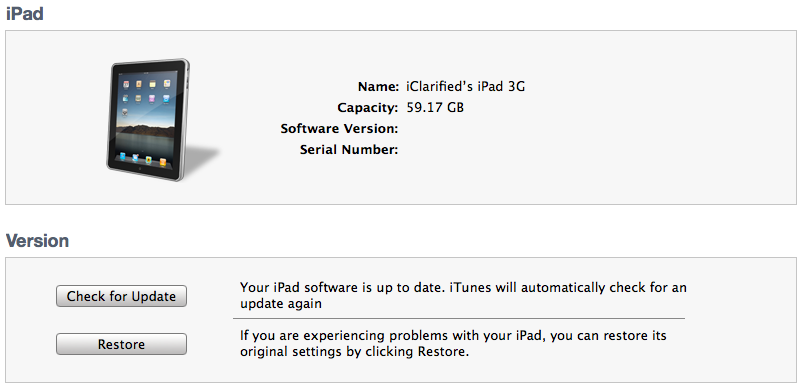
Connect your iPad to the computer and launch iTunes.
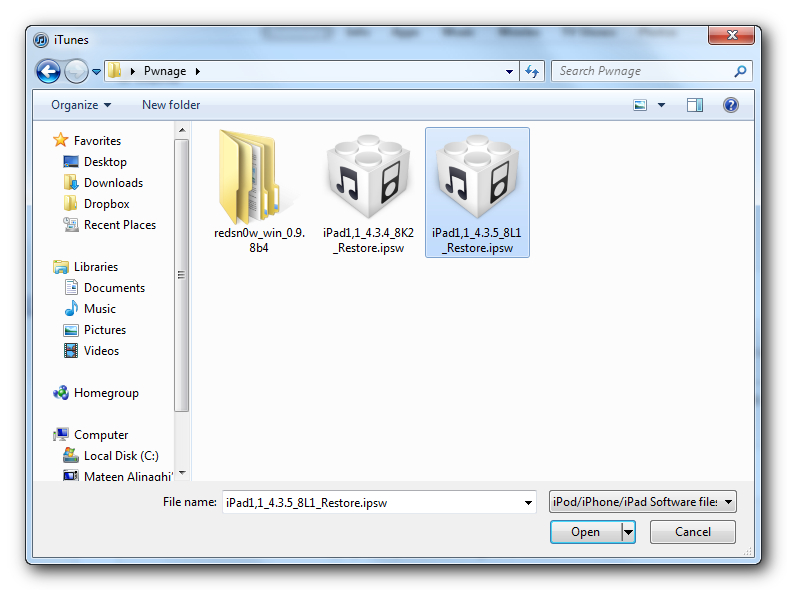
Select your iPad from the list of devices on the left. Now hold down Shift and click the Restore button. Restore is preferred as it wont create any wasted space on your iPad.
Navigate to the Pwnage folder on your desktop and select the 4.3.5 firmware ipsw. Click the Choose button to continue.
Step Three
Once iTunes has finished updating your iPad to the desired firmware open the Pwnage folder on your desktop and launch the redsn0w application from the redsn0w folder we extracted earlier.
**Windows 7 users may need to run RedSn0w in Vista Compatibility mode. You can do this by right clicking the executable and selecting Properties from the contextual menu.
Step Four
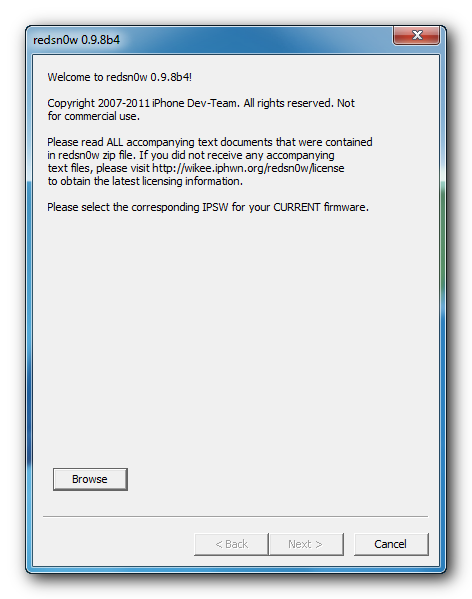
Once RedSn0w opens click the Browse button
Step Five
Select the 4.3.5 firmware ipsw we placed in the Pwnage folder on our desktop then click Open.
Step Six
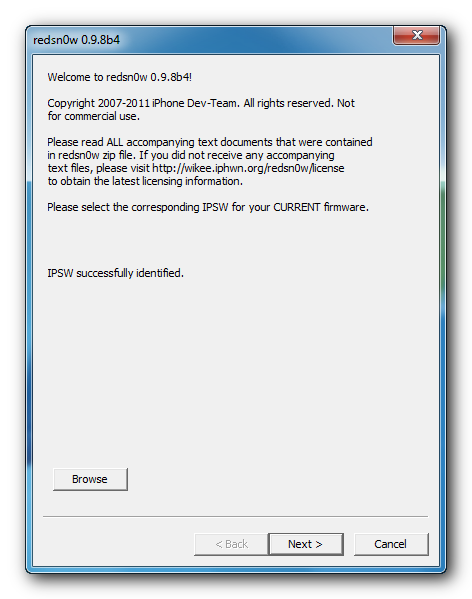
Once the firmware has been verified click the Next button to continue.
Step Seven
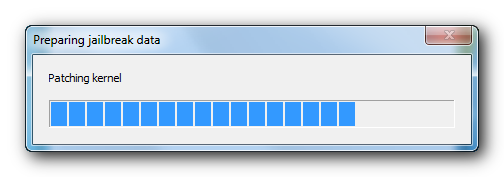
RedSn0w will now prepare the jailbreak data
Step Eight
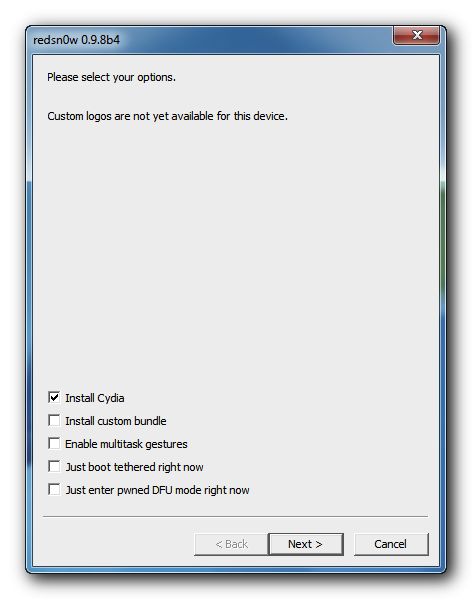
From this window you can select the jailbreak options you would like. Make sure Cydia is selected and click the Next button to continue.
Step Nine
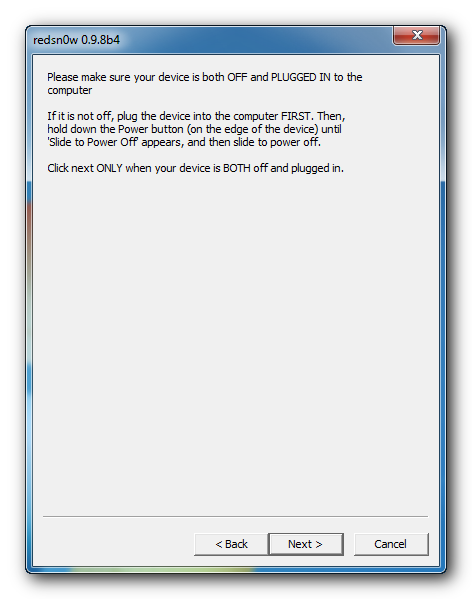
Please plug your iPad into the computer and make sure its OFF then click the Next button
Step Ten
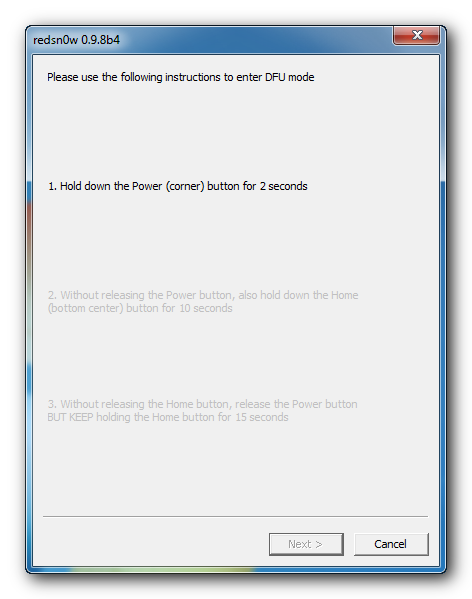
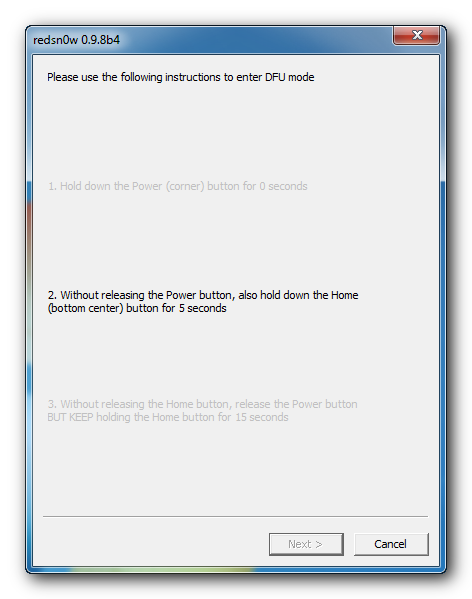
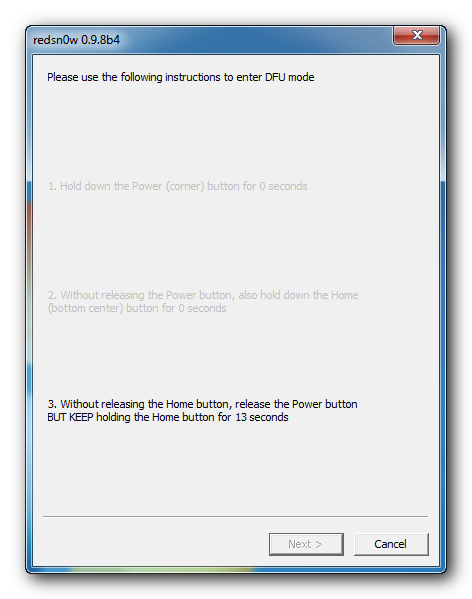
RedSn0w will now guide you through the steps to get into DFU mode. You can find more help with DFU mode here
Hold down both the Home button and the Power button for 10 seconds.
Release the Power button and continue holding the Home button until RedSn0w detects the device.
Step Eleven
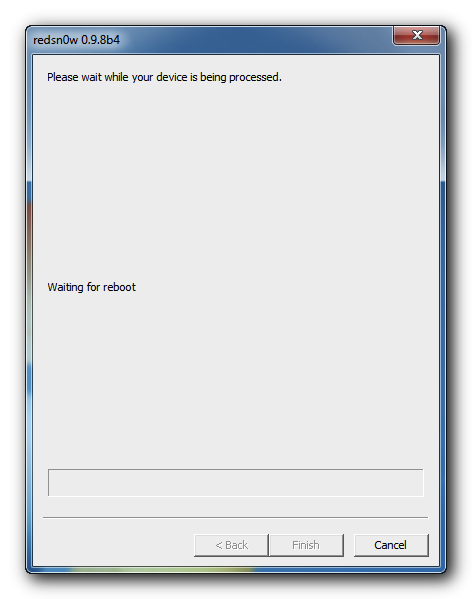
Your iPad will now reboot
Step Twelve
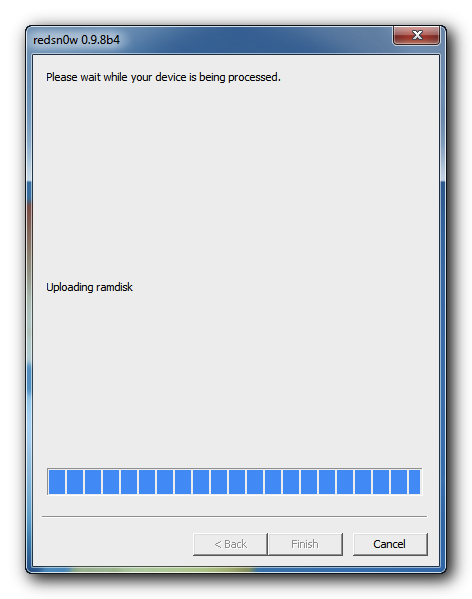
RedSn0w will then begin uploading the new RAM Disk and Kernel.
Step Thirteen
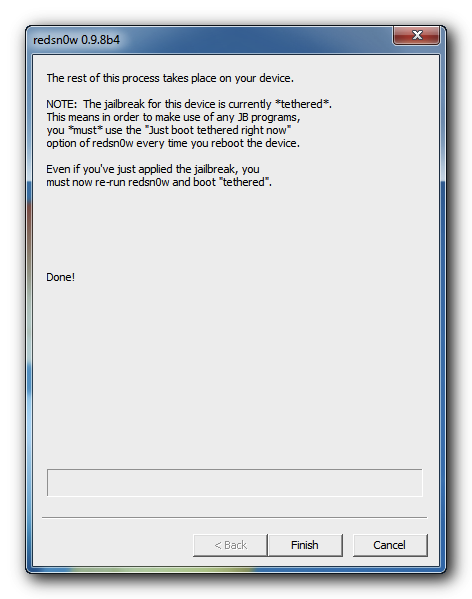
Once this is complete you will be notified that RedSn0w is done. Click the Finish button. When your iPad finishes rebooting (5 minutes or so) it will be jailbroken with Cydia on the SpringBoard.
BOOT TETHERED
Since this is a tethered jailbreak you must use Redsn0w to help you boot back into your jailbroken device if its powered off for any reason. Simply connect your iPhone to the computer, launch RedSn0w, select Just boot tethered right now from the options window and click Next to have RedSn0w boot your device.
*As usual a big thanks to the iPhone Dev-Team for their hard work and contribution to the iPhone community.
**Windows 7 users can try running RedSn0w as an administrator in Windows Vista or XP compatibility mode if you experience any difficulties



Subscribe to:
Posts (Atom)